
As technology evolves, the quest for faster, more efficient storage solutions brings us to the era of M.2 Solid State Drives (SSDs). These compact, high-speed devices are transforming the computing experience, offering unparalleled performance compared to traditional hard drives.
In this guide, I’ll walk you through the intricacies of installing an M.2 SSD, ensuring even beginners can upgrade their systems confidently.
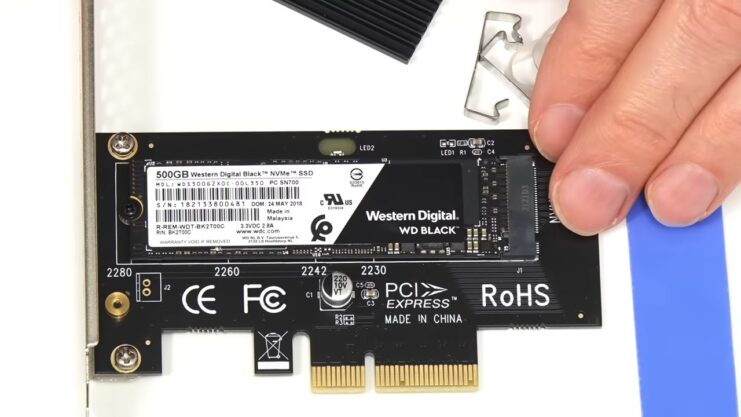
M.2 Solid State Drives
M.2 Solid State Drives stand out for their size and speed. Unlike the larger 2.5-inch Solid State Drives, M.2 drives are small, resembling a stick of gum.
They connect directly to the motherboard, reducing latency and increasing transfer speeds. These drives are ideal for laptops and small-form-factor PCs where space is at a premium.
The Benefits of This Upgrade
Upgrading to an M.2 SSD brings significant benefits. Speed is the most notable, with these drives boasting faster boot times and quicker file transfers.
They also consume less power, generate less heat, and, thanks to their solid-state nature, are more durable and reliable than traditional hard drives.
Preparing for the Installation
Before starting the installation process, it’s crucial to ensure compatibility. Check your motherboard’s specifications to confirm it has an M.2 slot. Additionally, back up your data to prevent any loss during the upgrade process.
Before proceeding with the installation of an M.2 SSD, gain a deeper insight into storage options by reading our detailed comparison of eMMC vs. SSD Storage.
Step-by-Step Installation Guide
Step 1: Gathering the Necessary Tools
To install an M.2 Solid State Drive, you’ll need a few basic tools:
- A Phillips-head screwdriver
- Your M.2 Solid State Drive
- Your PC or laptop
- An anti-static wristband (optional but recommended)
Step 2: Accessing the Motherboard
First, power down your computer and unplug all cables. If you’re working on a laptop, remove the battery. Open your PC case or laptop back panel to access the motherboard.
It’s a good idea to ground yourself with an anti-static wristband to prevent damaging the components.
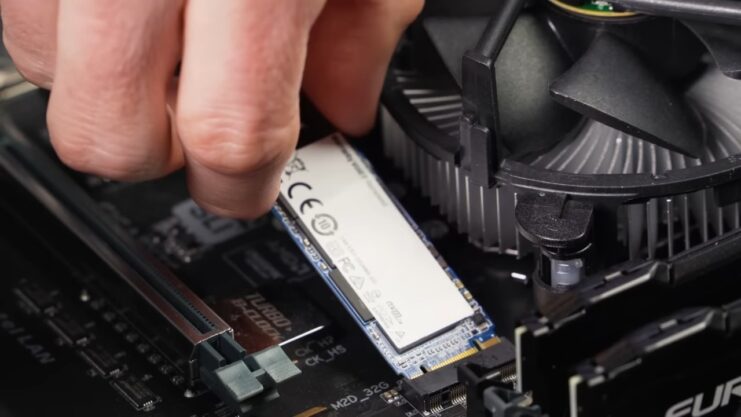
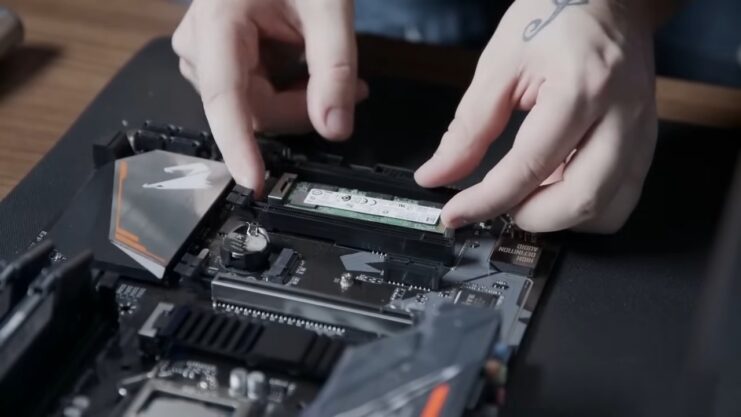
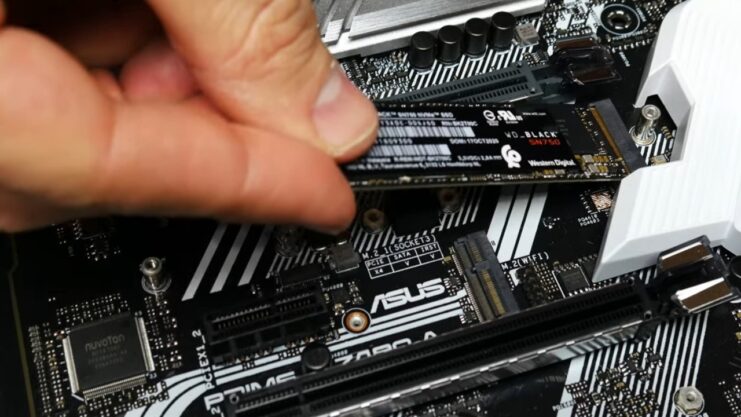
Step 3: Installing the M.2 SSD
Locate the M.2 slot on your motherboard. Gently insert the M.2 SSD into the slot at a 30-degree angle. Press down on the other end of the Solid State Drive until it sits flat, then secure it with the screw provided. Ensure the drive is firmly in place.
Post-Installation Steps
Initializing and Formatting the M.2 SSD
Once the hardware installation is complete, the next step is to initialize and format the SSD. Boot up your computer, and in Windows, go to “Disk Management.”
You should see your new drive listed as unallocated. Right-click on it and select “Initialize Disk,” then follow the prompts to format it.
Cloning or Installing a New Operating System
If you’re replacing your old drive, you can clone your existing system onto the new M.2 SSD using cloning software. Alternatively, you can perform a fresh installation of your operating system, which is often recommended for optimal performance.
Optimizing Performance
To maximize the performance of your new M.2 Solid State Drive, ensure your BIOS is set to AHCI mode. You can also enable features like TRIM, which helps maintain the speed and longevity of your SSD over time.
Troubleshooting Common Issues
Recognizing and Resolving Compatibility Issues
Not all M.2 SSDs are created equal. Some use the SATA interface, while others use NVMe. Ensure your motherboard supports the type of M.2 SSD you have.
If your system doesn’t recognize the Solid State Drive, check for any BIOS updates that might add support to your drive.
Dealing with Installation Challenges
M.2 SSD installation is usually straightforward, but problems can arise. If the drive isn’t sitting correctly, double-check that you’ve inserted it at the correct angle and that the screw is tightly secured.
Addressing Performance Concerns
If your new SSD isn’t performing as expected, check your motherboard’s manual for any specific settings that need to be adjusted. Updating your motherboard’s BIOS and SSD firmware can also improve performance.
Enhancing Your PC with an M.2 Solid State Drive
The journey of upgrading to an M.2 SSD is not just about installation but also about understanding and leveraging its capabilities to enhance your computing experience.
Maximizing System Potential
With an M.2 SSD in place, your system’s potential escalates significantly. You’ll experience faster boot times, quicker application launches, and overall enhanced system responsiveness. For gamers, graphic designers, and video editors, this means a smoother, more efficient workflow.
Future-Proofing Your System
As technology advances, so does the need for faster storage solutions. M.2 SSDs are at the forefront of this evolution. By upgrading, you’re not only boosting your current system’s performance but also future-proofing it for upcoming software and applications that will increasingly rely on fast storage and responsive memory. Additionally, having ample RAM ensures smooth multitasking and quick access to frequently used data, enhancing your overall computing experience.
The Impact on Laptop Users
For laptop users, an M.2 SSD upgrade can be transformative. It not only speeds up performance but also offers improved battery life due to the efficiency of SSDs over traditional hard drives. This upgrade makes a significant difference in portable computing, providing a more responsive and enjoyable experience.
3 Advanced Tips

After installation, there are additional steps and considerations for getting the most out of your M.2 SSD.
1. Ensuring Optimal BIOS Settings
For the best performance, enter your system’s BIOS and ensure that the storage configuration is optimized for your M.2 SSD. This usually means selecting AHCI mode for SATA M.2 SSDs or enabling PCIe mode for NVMe drives.
2. Balancing Performance and Longevity
While M.2 Solid State Drives are robust, they have a finite lifespan dictated by write cycles. To extend the life of your Solid State Drive, minimize unnecessary writes.
This can include disabling certain features like hibernation and ensuring your operating system and applications are SSD-friendly.
3. Knowing About Thermal Management
High-speed M.2 SSDs, especially NVMe models, can generate significant heat. Ensure your system has adequate cooling, which may include using thermal paste, to maintain optimal performance and longevity. Some motherboards come with built-in M.2 heatsinks, or you can purchase aftermarket solutions.
The M.2 Solid State Drive Landscape

As the technology landscape continues to evolve, M.2 SSDs stand out as a key component in modern computing, offering an ideal blend of speed, size, and efficiency.
Different M.2 SSD Types
M.2 Solid State Drives come in various types, primarily differentiated by their interfaces: SATA and NVMe. SATA M.2 SSDs offer speeds comparable to standard 2.5-inch SATA Solid State Drives, while NVMe M.2 Solid State Drives provide significantly higher speeds, leveraging the PCIe bus. Knowing the type that your motherboard supports is crucial.
The Role of Form Factor
M.2 SSDs also vary in length and width, commonly designated as 2280, 2260, and so on. This notation indicates the dimensions of the SSD (22mm wide and 80mm long, for example). Ensure that your motherboard has the appropriate size slot for your chosen SSD.
Picking the Right Capacity
Capacity is another important consideration. M.2 SSDs range from 128GB to several terabytes. Your choice should be influenced by your storage needs and budget.
For most users, a 500GB or 1TB drive strikes a good balance between cost and storage space.
Advanced Integration Techniques
Beyond basic installation, integrating an M.2 SSD into your system can involve more advanced techniques, especially for users looking to optimize their setup.
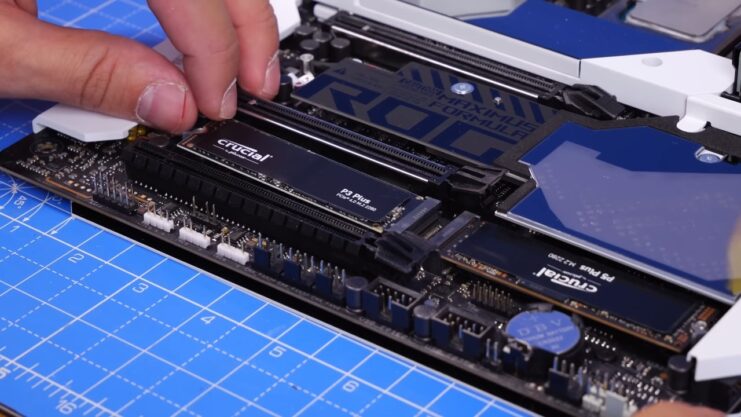
Configuring RAID with M.2 Solid State Drives
For those seeking even higher performance or data redundancy, setting up a RAID configuration with multiple M.2 SSDs is an option. This, however, requires a motherboard that supports RAID and multiple M.2 slots.
Dual-Drive Systems: M.2 SSD and HDD
Combining an M.2 SSD with a traditional hard drive can offer the best of both worlds: speed and large storage capacity. Use the Solid State Drive for your operating system and most-used applications, while the HDD can store larger files and less frequently used data.
Leveraging M.2 for Creative Professionals
For creative professionals, an M.2 SSD can significantly impact workflows. Tasks like video editing, 3D rendering, and large-scale graphic design become much more efficient with the high-speed data access that M.2 Solid State Drives provide.
FAQs

Can I Use an M.2 SSD as My Primary Drive?
Absolutely. An M.2 Solid State Drive can be your primary drive, housing your operating system and applications. This is the best way to take full advantage of its speed.
How Do I Choose the Right M.2 SSD?
Consider factors like capacity, read/write speeds, and the interface (SATA vs. NVMe). Your motherboard’s compatibility is crucial, so refer to its specifications when choosing your drive.
Is the Upgrade Worth It for Older Computers?
It depends on the system. If your older computer has an M.2 slot, upgrading can provide a significant performance boost. However, for systems without M.2 support, other upgrade paths might be more beneficial.
Can I use an external enclosure for my M.2 SSD to use it as a portable drive?
Yes, you can use an external enclosure designed for M.2 SSDs to make your drive portable. These enclosures typically connect via USB-C or USB 3.0. Ensure the enclosure is compatible with your M.2 Solid State Drive type (SATA or NVMe).
Will upgrading to an M.2 SSD void my computer’s warranty?
It depends on the manufacturer’s policy. In many cases, upgrading to an M.2 Solid State Drive won’t void your warranty, but it’s best to check with your PC manufacturer. Some manufacturers require upgrades to be performed by certified technicians.
Is it necessary to update firmware on an M.2 SSD?
Periodically, yes. Manufacturers release firmware updates to improve performance, resolve issues, and increase stability. It’s advisable to check the manufacturer’s website for updates after installation.
Can I use both M.2 and SATA SSDs in my system simultaneously?
Yes, if your motherboard has the necessary slots, you can use both M.2 and SATA SSDs in the same system. This setup allows for flexibility in managing storage and performance.
Do I need to change any settings in Windows to get the best performance from my M.2 SSD?
Windows usually detects and optimizes settings for Solid State Drives automatically. However, ensuring that features like “AHCI mode” in BIOS and “TRIM” in Windows are enabled can enhance the performance and longevity of your Solid State Drive.
Are there any thermal concerns with NVMe M.2 SSDs in laptops?
NVMe M.2 Solid State Drives can run hotter than their SATA counterparts due to higher performance. In laptops, this can be a concern due to limited space for cooling.
Some high-performance laptops come with built-in thermal solutions for these Solid State Drives. If heat becomes an issue, consider a laptop cooling pad or check if your laptop manufacturer offers a heatsink solution. Monitoring the CPU temperature can also provide insights into the overall thermal health of your laptop, helping you address any potential overheating concerns proactively.
Concluding Thoughts
Installing an M.2 SSD is a worthwhile upgrade that breathes new life into your computer. With this guide, you’re well-equipped to make this upgrade smoothly. Enjoy the blistering speeds and improved efficiency that come with stepping into the world of M.2 SSDs.