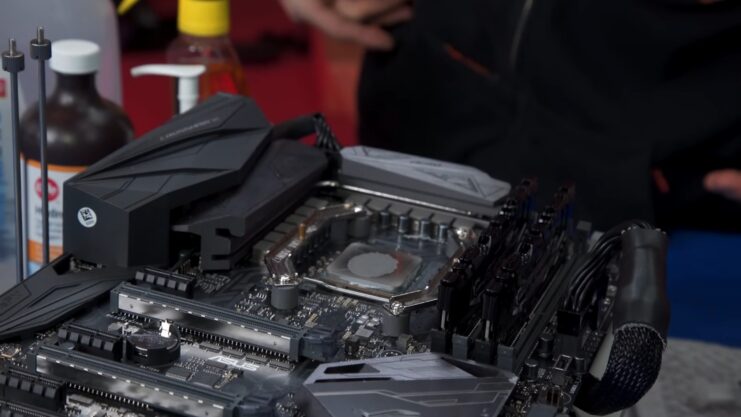
When it comes to maintaining your PC, certain tasks might seem minor but play a pivotal role in system performance. Cleaning thermal paste off the CPU is one such task that, while often overlooked, is fundamental for anyone serious about their rig.
It’s a simple procedure, yet the precision and knowledge required to execute it flawlessly come from years of tinkering and countless builds. The process not only demands a steady hand but an appreciation for the delicate interplay between hardware components and their thermal management.
Thermal paste, though just a small component in the grand scheme of a PC build, has a critical job. It forms the essential thermal bridge that draws heat away from your CPU. However, it does have a lifespan, and its maintenance is not just about cleanliness but about keeping your system running at peak efficiency.
In this guide, I’ll walk you through the cleaning process, imparting tips and tricks that ensure a residue-free surface for optimal heat conductivity. Let’s get to work.
What You Need to Know Before Starting
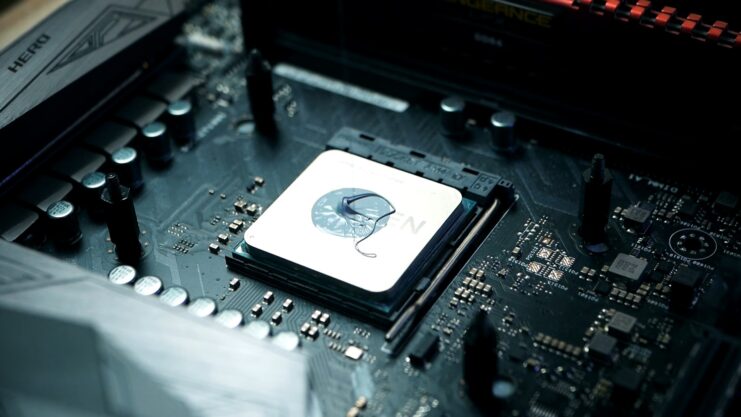
Before you start cleaning, it’s important to have a grasp of what you’re dealing with. Thermal paste, also known as thermal compound, is a heat-conductive paste that’s used between the CPU and its heatsink to ensure efficient heat dissipation.
Over time, this paste can dry out, or you may need to replace your cooler, necessitating its removal.
The Importance of a Clean CPU Surface
A clean CPU surface is crucial for optimal thermal performance. Any residual thermal paste can act as an insulator, hindering the heat transfer from the CPU to the heatsink leading to potential overheating issues. This is why a thorough cleaning process is essential.
Safety Precautions and Preparations
Before you proceed, ensure your workspace is uncluttered and static-free. You’ll need to ground yourself to prevent static electricity from damaging your components.
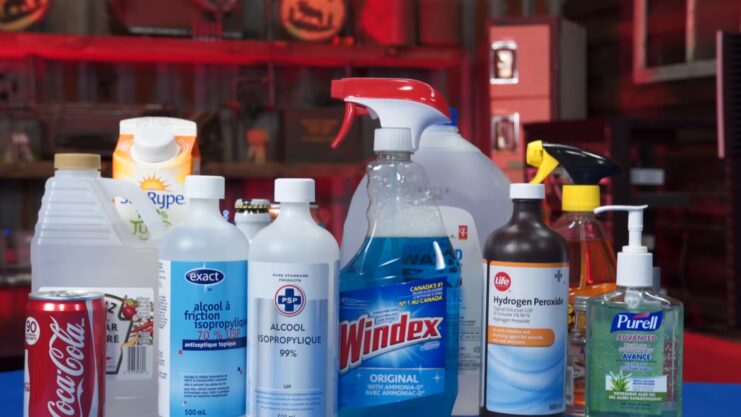
Moreover, gather all the necessary tools and materials like isopropyl alcohol, microfiber cloths, and plastic cards to scrape off the paste.
Step-by-Step Guide to Cleaning Thermal Paste
The process of cleaning thermal paste involves a few steps that need to be followed diligently to avoid any damage to your CPU.
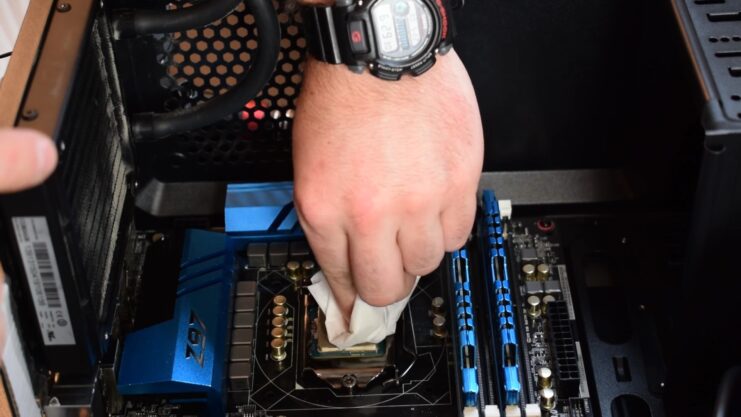
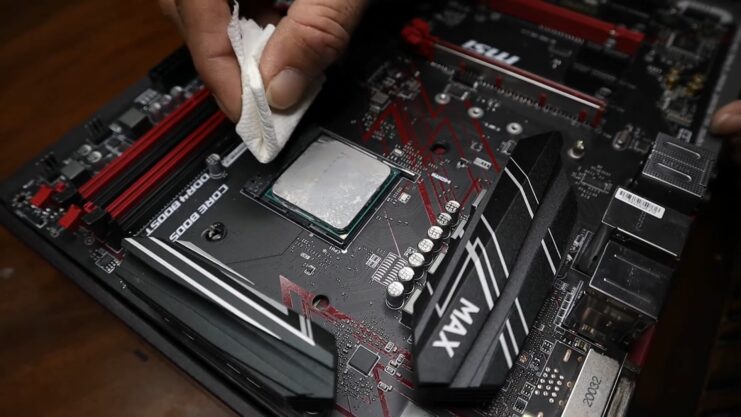
Initial Cleaning: Removing the Bulk
Begin by gently scraping off the larger chunks of dried thermal paste with a plastic card. It’s important to use plastic as it’s less likely to scratch the delicate CPU surface compared to a metal tool.
Deep Cleaning: The Isopropyl Alcohol Method
Once the bulk is removed, dampen a microfiber cloth with a bit of isopropyl alcohol and wipe away the remaining paste. The higher the concentration of the alcohol, the better it will dissolve the thermal paste without leaving any residue.
Final Touches: Ensuring a Spotless Surface
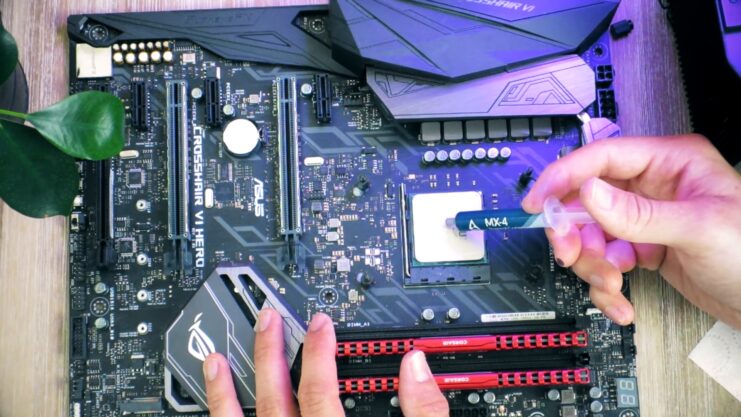
After the majority of the paste is dissolved, take a fresh cloth with a few drops of alcohol to give it one last wipe. This will ensure that the CPU surface is immaculate and ready for a fresh application of thermal paste.
The Role of High-Quality Materials
Choosing the right materials for the cleaning process is just as important as the process itself. Let’s explore the role of each.
Importance of High-Concentration Isopropyl Alcohol
High-concentration isopropyl alcohol is more effective in breaking down the thermal paste and evaporates quickly, leaving a clean, residue-free surface. This ensures that there are no contaminants that might affect the thermal conductivity.
Choosing the Right Cloth for Cleaning
A lint-free microfiber cloth is recommended as it doesn’t leave any fibers behind that could interfere with the CPU’s surface or the new layer of thermal paste. The softer texture also ensures that you don’t scratch or damage the CPU.
Troubleshooting Common Issues
Sometimes, you might encounter stubborn thermal paste or accidental spills. Here’s how to handle these situations.
Dealing with Stubborn Thermal Paste
If you come across thermal paste that won’t budge with the usual method, applying a cleaner or a higher concentration of alcohol can help. Leave it on for a few minutes to soften the layer before wiping it off.
Managing Spills and Accidents
If thermal paste gets on other components, it’s vital to clean it up immediately. Use the same cleaning method with isopropyl alcohol and be extra cautious around sensitive areas.
Advanced Tips for Perfect Removal
The Role of Technique
Removing thermal paste from a CPU isn’t just about scrubbing away old material; it involves finesse. The right technique ensures that you avoid any damage while thoroughly cleaning the surface.
Heat: An Ally in Disguise
Sometimes, you might find that the thermal paste is too stubborn. A little heat can help. Briefly running the PC before shutting it down can warm up the paste, making it easier to remove.
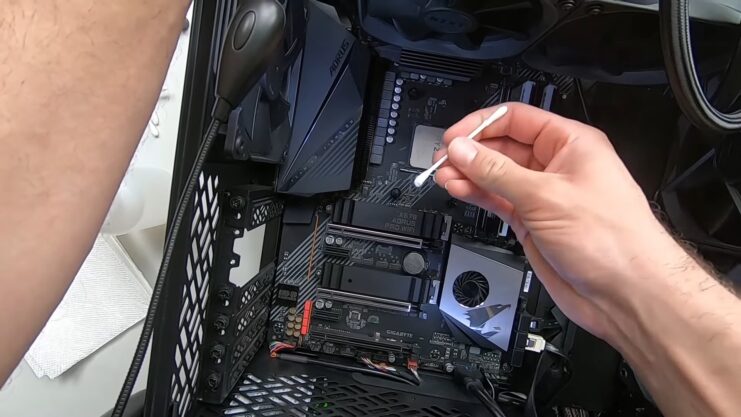
Detailing with Precision
For the hard-to-reach places, such as around the edges of the CPU, you can use a cotton swab dipped in alcohol. This allows for targeted cleaning without risking the delicate components.
The Next Steps: Reassembling Your PC
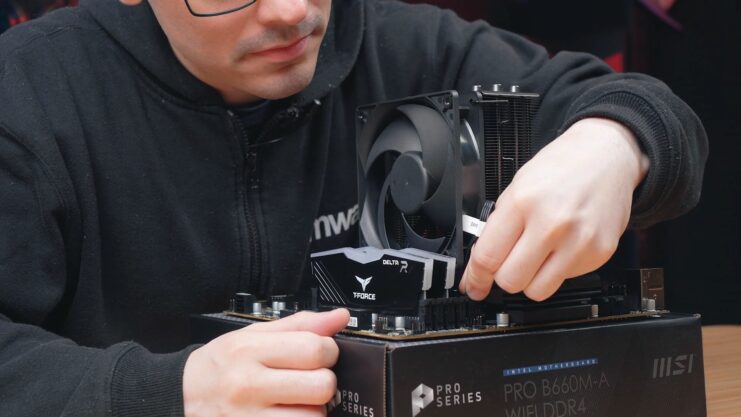
Mounting the Cooler
After applying the new thermal paste, it’s time to reattach the cooler. Line it up carefully and lower it onto the CPU without sliding it around to avoid air bubbles in the paste.
Final Inspection
Before powering up your PC, do a final inspection to make sure everything is reconnected properly. This includes the cooler’s power connector and any other components you may have disconnected during the process.
Maximizing Longevity and Performance
Regular Maintenance
Cleaning thermal paste should be part of your regular PC maintenance routine. Depending on your usage, consider cleaning and reapplying paste every 1-2 years.
Monitoring Temperatures
Keep an eye on your CPU temperatures with software tools. If temperatures seem high, it might be time to check your thermal paste.
Investing in Quality
Not all thermal pastes are created equal. Investing in a high-quality one can mean better performance and less frequent applications.
FAQs
Can I use rubbing alcohol from my medicine cabinet to clean off the thermal paste?
It’s best to use the highest percentage of isopropyl alcohol available, ideally 99%. Common rubbing alcohol often contains additives and is usually around 70% alcohol, which can leave behind a residue. However, if you’re in a pinch and it’s all you have, it can be used cautiously.
How do I dispose of old thermal paste?
Old thermal paste should be treated as chemical waste. It should not be poured down the drain or thrown directly into the trash.
Instead, wipe it off the CPU and the cloth you used for cleaning and dispose of it in a sealed bag. Check with your local waste management services for chemical disposal guidelines.
Can thermal paste expire or go bad?
Yes, it can expire. Most pastes have a shelf life of about 3 years unopened. Once opened, it should ideally be used within 1-2 years. You can tell it’s gone bad if it’s separated, excessively thick, or hard to spread.
How do I know if I need to clean and reapply thermal paste?
Signs that you might need to clean and reapply it include higher than normal CPU temperatures, thermal throttling, or if it’s been a couple of years since the last application. It’s also necessary to reapply if you’re replacing the CPU cooler.
Is it possible to clean the thermal paste without removing the CPU from the motherboard?
Yes, it is possible. Take extra care not to let any paste fall into the socket, and be gentle to avoid shifting the CPU and bending pins.
Can I use thermal paste cleaning solutions that are marketed specifically for this purpose?
There are specially formulated cleaners available that can be very effective and safe to use. They often come in kits with cleaning solutions and surface purifiers. Make sure to follow the manufacturer’s instructions when using these products.
Final Words
A clean CPU not only operates more efficiently but also prolongs the life of your hardware. By following these steps, you can ensure that your CPU and cooler are in top-notch condition, and ready to take on intense computing tasks without the fear of overheating.
Remember, maintaining your hardware is just as important as selecting high-quality components. A little effort in keeping your CPU clean can go a long way in ensuring the smooth running of your system.