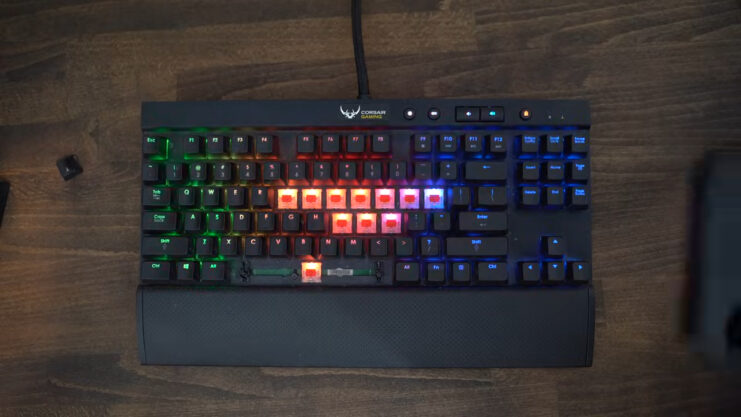
I often find myself needing to remove the keycaps to clean the keyboard or replace the switches. Unlike membrane keyboards, being able to remove mechanical keyboard keys with the right tools and techniques ensures the longevity and performance of my beloved keyboard.
Knowing how to remove mechanical keyboard keys is not only valuable for maintenance purposes, but it also allows me to customize my keyboard with new keycap sets or fix broken switches.
By following the proper steps and using the right tools, removing keycaps can become a simple and enjoyable part of mechanical keyboard ownership.
Mechanical Keyboard Keys Removal Process
Start by gathering the necessary tools – a keycap puller is the most suitable tool for removing mechanical keyboard keys.
If I don’t have one, a DIY keycap puller can be made using a paperclip by bending it into a “U” shape and bending the ends inwards to hook onto the keycaps effectively.
To remove keycaps, follow these general steps:
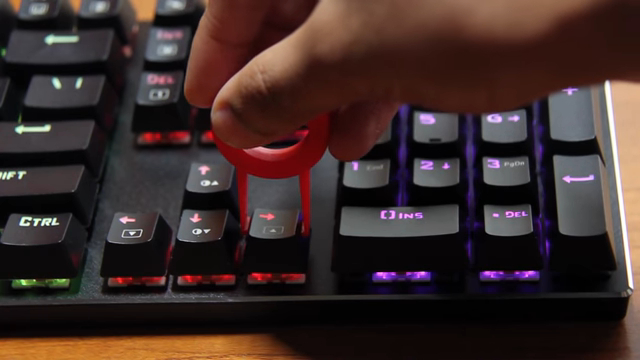
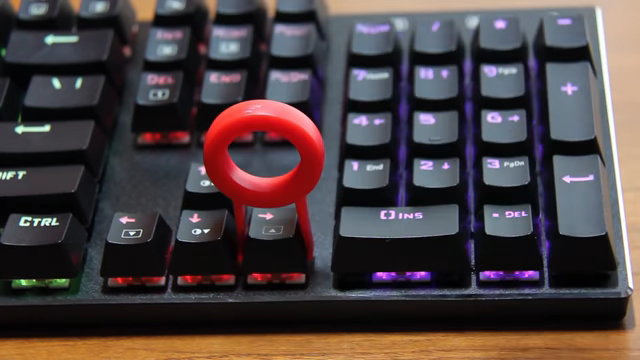
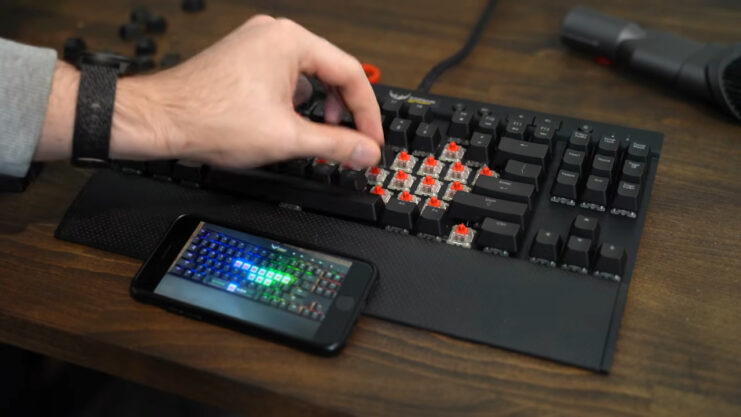
- Position the keycap puller: Hold the keycap puller or the DIY paperclip puller using my thumb and index finger. Carefully, slip the puller’s hooked ends underneath the sides of the keycap, while ensuring that the hooks are gripping the keycap firmly.
- Gently pull the keycap: Once the keycap puller is securely attached to the keycap, apply gentle pressure to pull the keycap straight upwards. It is essential to avoid twisting or bending the keycap as it may damage the keycap or underlying switch.
- Remove surrounding keycaps: For better access to hard-to-reach keys, you may need to remove adjacent keycaps first, then proceed to detach the desired key.
- Clean the keyboard: After removing all necessary keycaps, it’s an excellent opportunity to clean the keyboard by gently wiping away dust and debris.
When reattaching the keycaps, simply align the keycap with the corresponding switch, then gently press down until it clicks into place. Be extra cautious when removing large keys (e.g., spacebar, shift, or enter) as they may have stabilizers connected to them, which makes them slightly more fragile.
Patience is key when removing mechanical keyboard keys to avoid causing any damage. Good maintenance is essential to prolong the life and function of my mechanical keyboard.
Following these steps, easily remove my mechanical keyboard’s keycaps, giving me the flexibility to clean, repair or customize the keys effectively.
Preparation Before Removal
Before you can start the removing process you need to need to do some preparation.
Gathering Necessary Tools
Before removing mechanical keyboard keys, it’s essential to gather the necessary tools for the task. I typically recommend using a wire keycap puller because they are less likely to scratch the keycaps compared to plastic keycap pullers.
If a keycap puller is unavailable, objects like a bent paperclip or a butter knife can also serve as improvised tools. It’s also essential to have a clean, flat surface to place the removed keycaps and possibly a small container to keep them organized during the process.
Safety Measures
When removing mechanical keyboard keys, there are a few safety measures I suggest following:
| Guideline | Description |
|---|---|
| Turn off and unplug the keyboard | This prevents accidental keystrokes and potential damage to the keyboard or connected devices. |
| Handle keycaps gently | When using a keycap puller or alternative tool, apply gentle, even pressure to avoid damaging the keycap or the switches. |
| Work methodically | I recommend starting from one corner of the keyboard and moving across in rows to avoid losing track of keycaps. |
| Keep track of keycap positions | It’s helpful to either take a photo of the keyboard before starting the process or use a keyboard layout diagram to ensure proper reassembly. |
By following these steps and ensuring proper preparation before removal, the process of taking off the mechanical keyboard keys should be smoother and more efficient.
Post-Removal Care
After the process is over, the post-removal care comes to the stage.
Cleaning the Keyboard
Once the keys are removed from mechanical keyboard, it’s crucial to clean the keyboard thoroughly to remove debris, dust, and odors that have accumulated over time. I use a soft brush, like a paintbrush or a toothbrush, to gently clean the areas between the key switches.
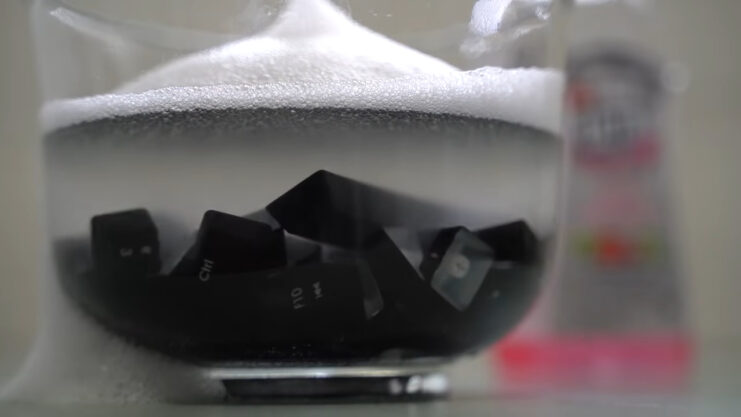
For more stubborn dirt, I could also use a can of compressed air to blow away the particles. To clean the keycaps, prepare a mixture of warm water and a gentle cleaning agent, like mild dish soap. I soak the keycaps in this solution for a few minutes, then gently scrub them with a soft brush to remove dirt and grime.
Finally, rinse the keycaps thoroughly in clean water and dry them with a lint-free cloth or air dry them on a towel. It’s essential to make sure the keycaps are completely dry before reattaching them to the keyboard.
Reattaching the Keys
After cleaning my keyboard and the keycaps, it’s time to reattach the keys. Start by aligning each keycap with its corresponding key switch on the keyboard. It’s important to make sure the keycaps are positioned correctly, as they may not function properly if placed incorrectly.
To reattach a keycap, gently press it onto the key switch until I feel it click into place. You might need to wiggle the keycap slightly to ensure that it’s securely attached. Continue this process for each key, making sure to double-check my work as you go along.
Once all the keycaps are reattached, my mechanical keyboard is clean, fresh, and ready to use.
Different Key Types
Now, we want to discuss the most important key types you should consider.
Mechanical Key Structures
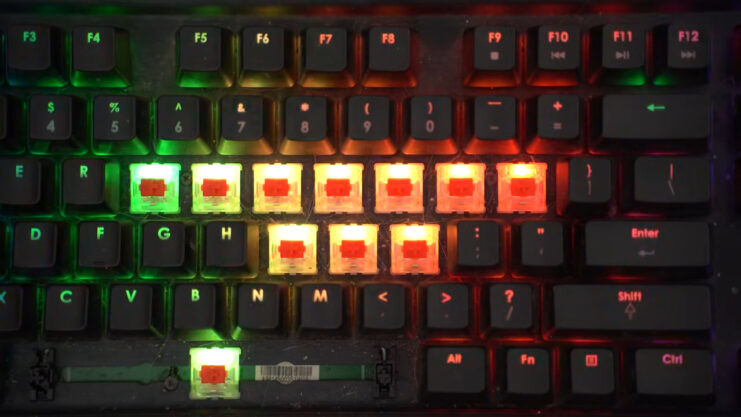
As a mechanical keyboard user, it’s essential to understand the different key structures. There are primarily three types of mechanical keyboard switches: linear, tactile, and clicky. Linear switches have a smooth, consistent keystroke, while tactile switches provide a bump mid-press, giving feedback when the key actuates.
Clicky switches, on the other hand, have an audible click sound along with the tactile bump, ensuring that the user is aware when a keypress registers. Some of the most popular switch manufacturers include Cherry MX, Gateron, and Kailh.
Each brand offers their linear, tactile, and clicky switches, with Cherry MX being the most well-known for its quality and wide variety. Here’s a brief summary of these switch types:
- Linear: Cherry MX Red, Gateron Red, Kailh Red
- Tactile: Cherry MX Brown, Gateron Brown, Kailh Brown
- Clicky: Cherry MX Blue, Gateron Blue, Kailh Blue
Recognizing Key Profiles
Another important aspect to consider when dealing with mechanical keyboards is the keycap profile. Keycap profiles refer to the shape and design of the keycaps, which can affect typing comfort and aesthetics.
There are numerous keycap profiles available in the market, with some of the most common ones being OEM, Cherry, SA, and DSA.
- OEM: Most common keycap profile, with sculpted and slightly angled keys, usually present in pre-built mechanical keyboards
- Cherry: Similar to OEM, but with slightly lower height and a more subtle angle, offering a comfortable typing experience
- SA: High profile, spherical keycaps with a retro look, often used in custom keyboard builds for their distinctive appearance
- DSA: Low profile, spherical keycaps, offering a flat typing surface, popular for their minimalist design
Recognizing different key structures and recognizing key profiles will help you make informed choices when modifying or building your mechanical keyboard. Ultimately, it’s a matter of personal preference and comfort, so experimenting with various switches and keycaps will help you find the perfect combination for your typing needs.
FAQs
What is the safest method to remove keys without causing damage?
The safest method to remove keys from a mechanical keyboard without causing damage is by using a keycap puller. This tool is specifically designed for removing keycaps, minimizing the risk of damaging the switches or the keycaps themselves.
Can keycaps be removed using only fingers or is a tool required?
While it is possible to remove keycaps using only your fingers, it can be challenging and could potentially damage the keycaps or the switches. Using a tool like a keycap puller is recommended because it is safer and ensures proper removal without causing any damage.
How do I take off and reattach the spacebar keycap?
Taking off the spacebar keycap can be slightly more complicated due to its size and stabilizers. First, use a keycap puller to gently lift both ends of the spacebar. Once the keycap is lifted, take care when removing it, as the stabilizers can be sensitive.
Are all mechanical keyboards designed with removable keys?
Most mechanical keyboards do have removable keys, as they are designed to be customizable and easy to maintain. Some low-quality or older mechanical keyboards may not have removable keycaps. It’s always best to check the manufacturer’s specifications and documentation for information about keycap removal and compatibility.
Where can I find a keycap puller or keycap remover tool?
Keycap pullers can often be found in online stores like Amazon or specialized electronic stores. Additionally, some mechanical keyboard kits come with a keycap puller included as part of the package. Make sure you purchase a quality tool to avoid damaging your keyboard during the removal process.
Closing Thoughts
Knowing how to remove mechanical keyboard keys is a valuable skill for anyone looking to maintain keyboard’s performance.
You can ensure that your mechanical keyboard stays in top condition, providing a satisfying typing or gaming experience for years to come.
Remember to be patient, gentle, and thorough in your approach to key removal to avoid any unintended damage.