Throughout the years, I had plenty of hands-on experience in undervolting GPUs, and I can attest to the transformative impact of this technique on your hardware’s performance and durability.
Undervolting, the methodical reduction of voltage to the GPU strikes a balance between power consumption and performance. Fine-tuning the voltage can effectively cut down on heat and power usage without compromising the GPU’s output.
Today, I will guide you through the critical steps and essential considerations for a successful undervolting process. Let’s start.
First Things First
Undervolting involves adjusting the voltage settings of a graphics card to a lower level than the default. This reduction in voltage reduces the power consumption and heat generation of the GPU without significantly impacting its performance. The process demands precision and an understanding of your GPU’s limits to avoid instability or damage. Bear in mind that if your GPU is high-end and the whole setup you own performs on a very high level, you will not have to undervolt your graphics card.
Identifying the Benefits
- Reduced Heat Output: Lowering the voltage decreases the amount of heat produced by the GPU, which is beneficial for overall system temperature management.
- Enhanced Efficiency: By consuming less power, the GPU operates more efficiently, which can be particularly advantageous for laptops to extend battery life.
- Increased Longevity: Lower temperatures and reduced stress on the GPU can potentially prolong its lifespan.
Risks and Precautions
While undervolting is generally safe, it’s crucial to proceed cautiously. Incorrect settings can lead to system instability, crashes, or, in extreme cases, hardware damage. Always monitor system stability after each adjustment.
Step-by-Step Guide
Preparing for Undervolting
- System Backup: Ensure all important data is backed up.
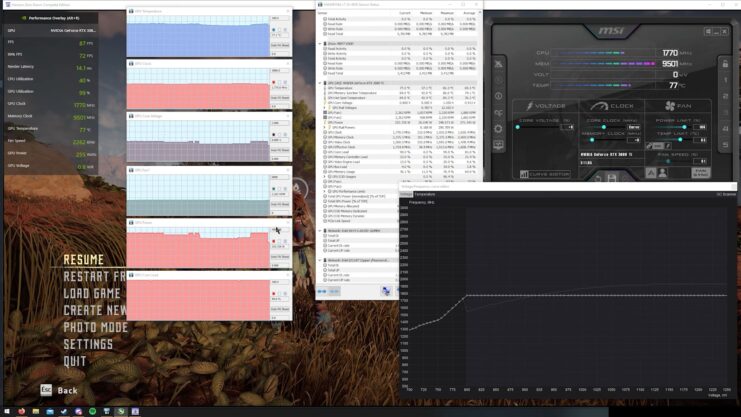
- Monitoring Tools: Install software like MSI Afterburner and HWInfo to monitor GPU performance and temperatures.
- Benchmarking: Run benchmark tests to record the baseline performance and temperature of your GPU.
Executing the Undervolting Process
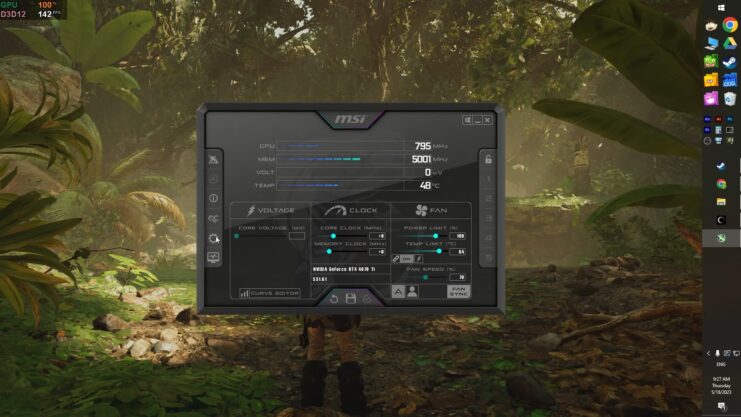
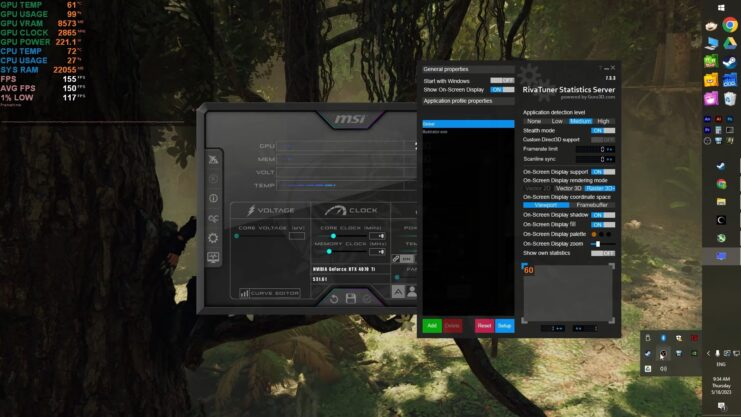
- Software Setup: Open your chosen utility, like MSI Afterburner.
- Voltage Curve Tuning: Access the voltage/frequency curve editor.
- Gradual Adjustments: Slightly lower the voltage while maintaining the GPU’s clock speed. Apply changes incrementally.
- Stress Testing: After each adjustment, use stress testing tools to check for stability and temperature improvements.
- Finding the Sweet Spot: Continue tweaking until you find a balance between lower voltage, stable performance, and acceptable temperatures.
Monitoring and Finalizing Adjustments
- Consistent Monitoring: Regularly monitor the GPU’s performance and temperatures.
- Final Tweaks: Make any necessary final adjustments to optimize stability and efficiency.
Advanced Considerations
The Role of Silicon Lottery
Understanding that each graphics card chip is unique and may respond differently to undervolting is vital. This variance, known as the ‘Silicon Lottery,’ means your results may differ from others, even with the same GPU model.
Pairing with Overclocking
For the more adventurous, combining undervolting with overclocking your GPU can yield even better performance gains. However, this requires a delicate balance and a deep understanding of your GPU’s capabilities and limits.
Long-Term Maintenance
Undervolting isn’t a set-it-and-forget-it process. Regularly revisit your settings, particularly after GPU driver updates, to ensure continued stability and efficiency.
Troubleshooting Common Issues
Dealing with Instability
If you encounter system crashes or instability, it’s a sign that the GPU might be undervolted too aggressively. Incrementally increase the voltage until stability is restored.
Performance Checks
Regularly compare the performance of your GPU against the baseline benchmarks. If performance drops significantly, you might need to adjust the voltage settings.
Heat Management
Even with undervolting, adequate cooling remains essential. Ensure your system has sufficient cooling to handle your GPU’s heat output.
The Software Landscape
Choosing the Right Tools
The success of your undervolting endeavor largely depends on the software you use. Popular choices include MSI Afterburner, EVGA Precision X1, and ASUS GPU Tweak II. Each offers unique features but generally provides the necessary controls for undervolting.
Understanding Software Features
- Voltage/Frequency Curve Editor: Allows for precise voltage adjustments at different frequency levels.
- Real-Time Monitoring: Essential for keeping an eye on GPU temperatures and performance metrics.
- User-Friendly Interface: A clear and intuitive interface simplifies the undervolting process, especially for beginners.
Software Limitations and Compatibility
Be aware that some GPUs, especially those in laptops, may have locked voltage settings due to manufacturer restrictions. Always check compatibility before proceeding.
Testing and Validation
Benchmarking for Performance
Before and after undervolting, run a series of benchmarks. Tools like 3DMark or Unigine Heaven provide a consistent environment to test GPU performance. Look for any loss in performance or artifacts that indicate instability.
Stress Testing for Stability
Use stress tests like FurMark or OCCT to push your GPU to its limits. This helps ensure stability under load. Monitor for crashes, graphical glitches, or system freezes, which indicate a need for voltage adjustment.
Temperature Monitoring
Keep a close eye on GPU temperatures during stress testing. A successful undervolt should lower temperatures without compromising performance.
Best Practices and Tips for Success
Start Small and Go Slow
Begin with small voltage reductions and test thoroughly before proceeding. This gradual approach helps avoid system instability.
Keep Detailed Records
Document each adjustment, including the voltage level and any changes in performance or temperature. This record-keeping is invaluable for troubleshooting and fine-tuning.
Be Patient and Persistent
Finding the optimal undervolt setting is a trial-and-error process. Don’t rush it, and be prepared to spend time tweaking and testing.
FAQs
Can undervolting a GPU lead to better overclocking results?
Yes, in some cases, undervolting can lead to better overclocking results. By reducing the voltage, you lower the heat generation of the GPU, which can provide more thermal headroom for overclocking.
This allows the graphics card to potentially reach higher clock speeds while maintaining a safe temperature range.
Does undervolting have any impact on the GPU’s ability to handle VR applications?
Undervolting should not negatively impact a graphics card’s ability to handle VR applications. As long as the GPU remains stable and operates within its performance capabilities, VR applications should run as usual.
However, it’s important to ensure that the undervolting process doesn’t lead to reduced performance, which could affect VR experiences.
How does undervolting affect the power consumption of the entire PC system?
Undervolting the GPU can lead to a noticeable reduction in the overall power consumption of the PC. The GPU is one of the most power-hungry components in a computer, so decreasing its power usage can have a significant impact on the total energy consumption of the system, especially under heavy loads like gaming or video rendering.
Is it necessary to adjust fan speeds when undervolting a GPU?
While undervolting generally reduces the GPU’s temperature, it’s still advisable to monitor and adjust fan speeds if necessary.
Proper cooling is essential, and depending on your system’s overall thermal dynamics, you might need to tweak fan settings to ensure optimal airflow and cooling performance.
Can undervolting help reduce GPU coil whine?
Undervolting can sometimes help reduce graphics card coil whine, which is often related to the power delivery and load on the GPU.
Lowering the voltage can decrease the intensity of the coil whine, although it’s not a guaranteed solution for this issue as the coil whine can be influenced by various factors.
Concluding Thoughts
Undervolting your graphics card can seem daunting at first, but with the right tools, a methodical approach, and a bit of patience, it can be a rewarding endeavor. By reducing the voltage to your GPU, you’re not just cutting down on heat and power consumption; you’re taking an active role in managing and optimizing your hardware.
This process does more than just improve efficiency; it deepens your understanding of how your GPU operates, allowing you to get the most out of your system. Whether you’re a gamer looking to squeeze every bit of performance out of your rig, a professional seeking quieter and cooler operation, or an enthusiast experimenting with hardware, undervolting offers a safe and effective way to achieve your goals.
Remember, the key is to start slow, monitor closely, and be ready to adjust as needed. With time and practice, you’ll master the nuances of undervolting, leading to a more optimized and capable GPU setup.